

Why defense matters more under 全銃
Under Mahjong House's standard rules a discard win is paid 全銃: the discarder pays 3 units alone, and the other two pay nothing. A self-draw costs each opponent 1 unit, with 1 extra faan for Self-draw. So dealing in costs you far more than losing to the same hand any other way:
| Their hand on your discard | You pay if you deal in (全銃) | You pay if they self-draw it instead | Under 半銃 you'd pay |
|---|---|---|---|
| 3 faan | 12 | 8 (4 faan) | 8 |
| 5 faan | 36 | 16 (6 faan) | 24 |
| 7 faan | 72 | 32 (8 faan) | 48 |
| 10 faan (cap) | 192 | 64 (still 10) | 128 |
Dealing in costs one and a half to three times what their self-draw would, and the points go straight to a rival. It's worse still under 包 (full responsibility): if your discard gives a player the third dragon pong for Big three dragons, the fourth wind pong for Big four winds or the fourth kong for Four kongs, you pay their whole limit hand alone, even if they go on to self-draw it. See the rules.
Defense doesn't mean playing scared. Most of the time it means choosing the safer of two tiles that are equally good for your hand, and knowing when a hand isn't worth the risk.
Reading danger
Live tiles (生章) and seen tiles (熟章)
A tile nobody has discarded yet is 生章, a live tile. Once copies have been thrown or shown in exposed sets it becomes 熟章, a seen (or "dead") tile. The more copies you can see (counting your own hand), the fewer ways anyone can be waiting on it:
- Honours can only be waited on as a pair or a pong. With three copies visible (yours included), the only way to win on it is a single wait (單吊) by whoever holds the fourth; with all four accounted for, it's safe against anything but Thirteen orphans. With none visible late in the hand, an honour is one of the most dangerous tiles you can throw.
- Terminals (1s and 9s) fit fewer shapes than middle tiles: a 1 can only finish 1-2-3, a pair or a pong.
- Middle tiles (3 to 7) fit the most shapes and are the most dangerous when live.
Whose discard was it?
The best evidence is the threatening player's own discards: they threw that tile, so they're less likely to be waiting on it, especially if they threw it after their last claim. Next best: a tile someone else threw since that player's last claim, which they let pass. But in Hong Kong rules neither makes a tile truly safe (see Riichi below).
Who looks ready?
- Exposed sets. One exposed set means little; three means they're very likely ready or close.
- Claim, then a middle tile. A player who claims and then lets go of a 3 to 7 has often just become ready.
- Time. A concealed hand that has made many discards is maturing; by the second half of the wall, assume someone is close.
- What they throw. When a player's discards change from honours and terminals to middle tiles they'd normally keep, their hand has probably settled.
Big hands on the table
Exposed sets show what a player is building. Two or more exposed sets of one suit point to a half or full flush: that suit becomes very dangerous to them, honours a little more so, and other suits much safer. Two dragon pongs showing make the third dragon both dangerous and a 包 tile; the same goes for the fourth wind after three wind pongs, or any tile that would give a player their fourth kong.
What Mahjong House's AI does on defense
The game's computer players and Sifu, the coach, share one danger model. It only uses what any player can see: the discards, exposed sets and who claimed what. In plain words:
- How likely is each opponent to be ready? Exposed sets, a claim followed by a middle-tile discard, and a long run of discards all raise its estimate. It never treats anyone as certainly ready.
- What would they win? It estimates their hand from what's exposed (more if their sets point to a flush) and turns that into what you'd pay under the table's rule.
- Could this tile be their winning tile? Live honours and middle tiles (3 to 7) are the riskiest; terminals, and tiles with copies already visible, are safer. Live honours get riskier as the wall runs down.
- Evidence cuts that. A tile the player threw themselves, or let pass after their last claim, is much safer, but never treated as completely safe: in Hong Kong rules a discarded tile is evidence, not a guarantee.
- Flushes and the end of the wall. Against a flush, that suit and the honours become far more dangerous and the other suits much less. Near the end of the wall, every tile gets more dangerous.
- Weighing it up. Each possible discard gets a score for speed (steps from ready, useful tiles) and faan, minus its expected loss: the chance of dealing in times what it would cost. Strong players care little about danger early in the hand and a great deal late, or once someone looks ready.
- Folding. When its hand is far from ready and an opponent looks ready in the middle or late part of the hand, it stops building and throws the safest tile. Cautious characters fold sooner, bold ones later, and opponents at the Relaxed level defend far less.
- Claims. When someone looks ready, cautious players stop chowing and stop ponging tiles that bring no faan, and nobody claims a kong late in the hand or adds a kong that a ready opponent could rob.
In the apps, Sifu shows this model at work: it names an opponent who looks dangerous, colours each tile in your hand green, amber or red by its risk, and switches its advice to "play safe" when it's time to fold.
Worked example: folding against a flush
You sit South in the East round, with 30 tiles left in the wall. North, across from you, has three exposed sets, all Bamboo, and has made nine discards:
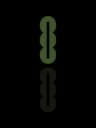
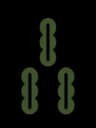
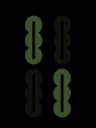
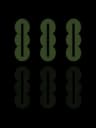
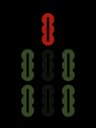

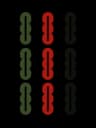
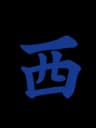
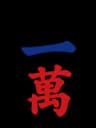
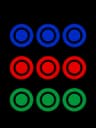

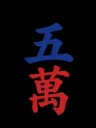
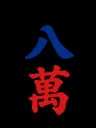

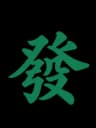
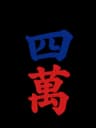
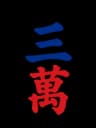
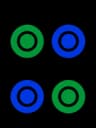
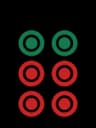
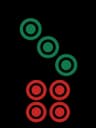

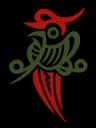
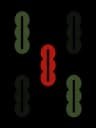
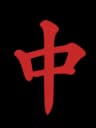
Mahjong House's model rates North about 95% likely to be ready, with a Bamboo flush. Your hand is far from ready, so Sifu folds. Here is the chance each discard deals in to someone:
| Discard | Chance of dealing in | Sifu's colour | Why |
|---|---|---|---|
| West Wind | 1.1% | Green | North threw one; three copies visible |
| 9 of Dots | 2.1% | Green | North threw one; you hold two |
| 8 of Dots | 5.0% | Green | West threw it after North's last claim |
| 4 of Characters | 5.6% | Green | North threw it after its last claim |
| 8 of Characters | 5.9% | Green | North threw it right after its last claim |
| 3 of Characters | 7.0% | Green | East threw it after North's last claim |
| 1 of Bamboo | 11.2% | Green | West threw one after North's last claim, but it's North's suit |
| 6 of Dots | 16.4% | Amber | A middle tile nobody has let pass since |
| 4 or 7 of Dots | 20.5% | Amber | Live middle tiles |
| Red Dragon | 29.0% | Red | Live honour, late in the hand |
| 5 of Bamboo | 66.3% | Red | Live, and in North's flush suit |
Notice the pair of West Winds: breaking it gives you two safe discards in a row, and the pair of 9 of Dots gives two more. That's four turns of safety before you have to touch anything amber. The 5 of Bamboo, the one tile that fits North's flush and has never been seen, is the tile to hold to the end.
Folding (收章, 拆牌) step by step
When to fold
Compare three things: how far you are from ready, how far into the wall you are, and how strong the threat looks.
- Ready, or 1 step away with a decent wait and enough faan: usually keep going, but take the safer of equally good discards.
- 2 or more steps away, someone looks ready, wall past its early stage: fold. This is the AI's own rule.
- Someone shows a big hand (a flush with three sets down, two dragon pongs, three wind pongs): fold earlier, and never feed the 包 tile.
- Your hand can't reach 3 faan in time: there's nothing to protect, so fold.
What to throw, in order
- Tiles the threatening player discarded themselves, preferably after their last claim.
- Tiles others threw since that player's last claim, which they let pass.
- Honours with three copies visible, then two.
- Terminals with most copies visible, and tiles of suits the threat isn't collecting.
- Last of all: live middle tiles, live honours and anything in a flush player's suit.
Break pairs and pongs of safe tiles. A safe pair is two safe turns; a safe concealed pong is three. That's often better than reaching for a merely "probably safe" single.
Watch everyone. A tile that's safe against the player you fear can be the winning tile of someone else, so check the other rivers too.
A draw is a good result. In Hong Kong rules nobody pays when a hand is drawn (流局), and there's no payment for being ready, so folding all the way to a draw costs you nothing. As the dealer, a draw also keeps your deal.
Coming from Riichi: what carries over
Many defense guides online are written for Japanese Riichi mahjong. Some of it works in Hong Kong mahjong, some doesn't:
- No riichi declaration. Nobody announces they're ready, so you read readiness from exposed sets, timing and discards instead.
- No furiten. A player may win on a tile they discarded themselves, and passing on a win doesn't stop them winning on the next one (Mahjong House's standard rules don't use 過水). So their own discards (genbutsu) are strong evidence, not a guarantee.
- Suji only partly applies. Suji ("they threw a 4, so 1 and 7 are safer") rests on furiten. Without it, it's weak evidence at best; Mahjong House's AI doesn't use it at all.
- Counting carries over fully. If all four 6 of Dots are visible, nobody can be waiting on 7-8 for a 6, and an honour whose other copies are all visible is as safe as in Riichi.
- Flushes matter more. A half flush alone is 3 faan, the whole minimum, so suit-heavy discards and exposed sets are a stronger signal than in Riichi.
- One winner per discard. In the standard rules, if several players could win on a discard, only the one next in turn after the discarder does (截糊), and the discarder pays alone, as in ron.
Practise reading danger
- [Daily puzzle](/daily): on many days the right answer is the safe tile, against an opponent who looks ready. Spot it before you see Sifu's answer.
- [The free browser game](https://play.mahjonghouse.app): Learn to Play includes a lesson on reading danger, and the club regulars punish careless discards.
- Sifu, the optional coach in the Mahjong House app, colours every tile in your hand by danger during solo games and tells you when to play safe.
- [Faan calculator](/faan-calculator): work out what an opponent's exposed hand could be worth before you risk feeding it.
Then read the strategy guide for the attacking side, the payout table for what each hand costs, and the rules for the full picture.
